


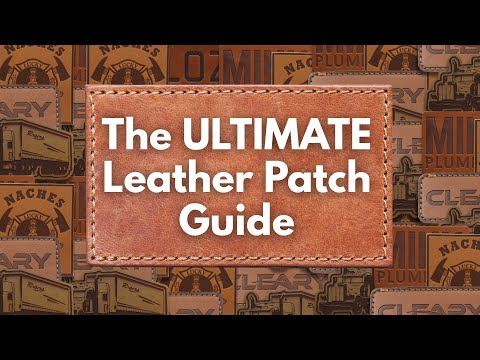
Ultimate Leather Patch Guide

Key Takeaways:
- ☛ Genuine vs. Faux Leather: Genuine leather patches offer natural texture and long-lasting durability, while faux leather (leatherette) provides a consistent look and more color options. Both have their perks, and choosing the right material depends on your needs and values (authentic feel vs. vegan-friendly consistency).
- ☛ Unlimited Design Options: You can customize patch shape, size, and color to fit your brand. From classic rectangles and circles to custom outlines that match a logo’s silhouette, leather patches can be cut to any shape. Simple logos often engrave sharply, but even intricate details can shine with techniques like laser engraving. There’s a rich palette of leather tones (natural tan, brown, black, etc.) and even colored faux leather, so your patch design won’t be limited.
- ☛ Attachment Methods: Multiple backing options let you add patches to hats and more. Popular choices are iron-on (heat-activated adhesive) for quick DIY projects, or sew-on for a stronger, long-lasting hold, and suggested for custom hat patches. There are also hook-and-loop (Velcro) backings and stick-on adhesives for exceptional cases. We’ll guide you on choosing the best method for your project.
- ☛ Quality & Brand Impact: Leather patches are a great way to elevate hats with a high-end, classic look. They’re durable against wear and tear, giving a long-lasting finish that can handle daily use. A well-crafted leather patch hat turns an ordinary cap into a walking advertisement for your brand – stylish, professional, and memorable. (It doesn’t hurt that The Monterey Company has over 30 years of experience making custom patches, so you’re in good hands!)
Save the reading and download our leather patch guide here.
Hello and welcome! If you’re looking to create fabulous custom leather patch hats, you’ve come to the right place. This leather patch guide will walk you through everything, perhaps even things you didn’t realize you needed to know. We’ll chat about choosing between genuine and faux leather, designing the perfect patch shape and colors, and even how to stick the patch onto a hat (or jacket, bag, you name it). Think of it as a friendly step-by-step guide, minus the stiff technical talk. I’m pretty excited to share these tips – I honestly wish I had this guide when I first started (I might have saved a couple of trial-and-error mishaps!).
👉 First-Time Here?Want to jump in and create your own custom leather patch hats right away? Get a free quote from The Monterey Company – our team can help bring your patch idea to life, with free shipping in the United States and top-notch customer service to answer all your questions. We’ll even help you choose the right patch options for the best results. Go ahead, give us a shout for a free quote, and let’s make something cool together! See what Reddit thinks of our leather patches >> Click Here.
Genuine vs. Faux Leather Patches: Choosing the Right Material
One of the first decisions in any leather patch project is the type of leather. Do you go with genuine leather or a faux leather alternative? It’s not always an obvious choice – I’ve had moments of indecision, holding two sample patches and thinking, ‘Which one feels more… me?’ Let’s break down the differences to help you pick the right leather for your patches.
Genuine Leather Patches: These are made from real animal hide (often cowhide, typically vegetable-tanned leather for a high-quality finish). Genuine leather has a timeless, premium feel. Each piece has natural variations in grain and tone, so your patches have a unique character. They’re known for being durable and aging nicely – in fact, a genuine leather patch can handle a lot of wear and tear and still look fantastic years down the road. The texture can vary, though; one patch might have a slightly different finish than another, which is part of the charm. If you love that authentic leather smell and the idea that your patch develops a bit of patina over time, genuine is the way to go. Plus, it’s tough as nails (or should I say, tough as leather)? I’ve seen genuine leather patches survive camping trips, rainstorms, and daily rough use without fraying or fading. They’re long-lasting by nature.
Faux Leather (Leatherette) Patches: Faux leather patches (also called leatherette) are man-made materials designed to mimic genuine leather. The Monterey Company offers high-quality leatherette that resembles the real thing almost perfectly. What’s the benefit of faux? For starters, it’s consistent – every patch has the same texture and color, with no natural imperfections. This uniformity is excellent for precise logo engraving, yielding very even, laser-sharp results. Faux leather is also often available in more color options than genuine – think greys, blues, even reds, beyond the usual browns and tans of genuine leather. And of course, faux leather is vegan-friendly (no animal products), which some brands and individuals prefer. Durability-wise, good leatherette is quite sturdy and even resistant to scratches or water. However, in my experience, a genuine leather might still edge it out in ultimate longevity (faux can eventually crack or peel if heavily worn over many years – perhaps, but high-grade faux is pretty impressive nowadays). If you need a precise patch color or want to ensure every patch looks the same, leatherette is a great way to go. It’s also typically a bit more affordable, and no cows were harmed in the making of your awesome hat patches.
In short, the leather patch guide rule of thumb is: choose genuine leather for that classic, one-of-a-kind richness (and super durable, long-lasting quality), or choose faux leather for consistency, color variety, and a modern touch. Both can yield beautiful results. Some folks even combine approaches – maybe use genuine leather for a rustic look on custom leather patch hats for a brewery, but use faux leather in school colors for a sports team project. There’s no wrong answer, just what fits your project. If you’re unsure, the Monterey Company team is happy to show samples and help you decide (honestly, seeing and feeling a swatch of each can make the choice easier).
(Quick personal take: I once had a custom patch made in a deep navy faux leather because I needed an exact color match for a client’s logo background. It looked so sleek, and nobody could tell it wasn’t genuine leather. On the other hand, my own favorite trucker hat has a genuine leather patch that’s gotten all sorts of character over time. I love both for different reasons!)

Design Essentials: Patch Shape, Size & Color Details
Designing your leather patch is where the fun really begins. You get to decide how it will look – not just what it will say or show (your logo or artwork), but the shape, size, and style of the patch itself. Unlike some pre-made patches you buy off a shelf, your custom patches can be virtually any shape or size. Patch shape can be as simple as a square or circle, or as fancy as the outline of your logo or a custom emblem shape. Love hexagons? Sure! Want a patch in the shape of a mountain for your outdoor brand? That’s doable too. There are stock shapes (round, square, oval, rectangle, etc.) if you want something classic, but you’re free to get creative. Don’t worry that a complex shape will be hard – The Monterey Company uses laser cutting and die cutting to match any outline. They even note that they offer “all the basic shapes that will show off your logo, including round, square, oval, diamond, hexagon, rectangle, and more”. So truly, you can get the perfect patches cut just the way you envision.
Size is another consideration. Many hat patches are approximately 2 to 3 inches across, as this size tends to fit nicely on the front panel of a baseball cap or trucker hat. For example, a popular size we often recommend is about 2.5” tall by 4” wide – big enough to be seen, but not so big that it won’t lie flat on a hat’s forehead area. (I learned the hard way that a patch that’s too tall can start to wrinkle on a curved cap.) Ultimately, the best size depends on your hat style and logo shape. A low-profile dad hat might need a slightly smaller patch than a high-crown trucker hat. Our design team usually helps ensure your design fits the hat just right. In fact, they suggest keeping patches under about 2.5″ tall for the best results on hats – that way it doesn’t bump into the hat’s curvature. The goal is a patch that looks proportional and sits on a nice flat surface of the hat.
Now, how about colors and artwork details on a leather patch? Traditional leather patches have a single-tone design – usually the design is laser-engraved or embossed into the leather. For instance, if you have a caramel-brown leather patch, engraving a logo might burn it to a darker brown/black, creating a monochrome but high-contrast look. Laser engraving is fantastic for capturing intricate details in your art; it can etch fine lines and small text that would be hard to achieve with, say, embroidery. Lasering or embossing allows for excellent detailing, ensuring your logo or design truly stands out on the patch. The result is often a clean, precise rendition of even complicated designs. I’m always a bit mesmerized overseeing a laser machine burn a design onto leather – perhaps I’m easily entertained, but it’s just so precise!
If you want more than one color on the patch, there are a couple of approaches. One option is to use faux leatherette patches that come in various base colors (black, grey, red, etc.) and then engrave the top layer to reveal a second color underneath (for example, carving a black faux leather patch might reveal a gold or silver layer for your logo). This can create a two-tone effect. Another method is printing: some custom patches can be screen-printed or UV-printed with color, or even use a printed fabric inset. The Monterey Company mentions a “full-color printed patch option for the most detailed designs”. In practice, this might mean that if your logo features complex color gradients or numerous hues, they can print the design onto a substrate that’s applied as a patch. However, most classic leather patches stick to the etched look. If bright colors are crucial, an Embroidered Patch or sublimated patch might be better alternatives – embroidered patches use colored threads to stitch your design (great for a textured, traditional look), and dye-sublimated patches can capture photo-like detail in fabric. It’s worth noting: embroidery digitizing (the process to convert your design for embroidery machines) isn’t needed for leather patches, since we’re not stitching the design. Instead, we’re effectively printing or engraving it on the leather. This makes the design process a bit quicker for leather patches: we take your artwork and either laser it directly or create a stamping die for embossing/debossing, without recreating it in stitches. So if you have a complex logo, leather might actually reproduce it more faithfully than embroidery, up to a point.
Finally, consider adding borders or edges. Some leather patches have a stitched border purely for style, or if they’re sewn on, the stitching itself creates a border-like appearance. You might have seen patches with a contrasting thread around the edge – it can give a nice finished touch. This is optional, but worth thinking about in your patch design. A stitched border isn’t required (unlike embroidered patches, which often have an overlock edge; leather patches usually have clean-cut edges since leather doesn’t fray). But stitching can be decorative and add to that rugged look. I personally love a cream-colored stitch around a dark brown leather patch; it reminds me of vintage saddlework and stands out nicely.
In summary, you have tons of creative freedom: pick a shape that complements your logo (even a simple logo can pop on an interesting patch shape), choose a leather color that suits your style, and decide if you want the design engraved, debossed, or even printed for extra color. The Monterey Company’s designers are happy to help fine-tune these details so the final product is exactly what you envisioned. It’s like crafting a tiny piece of art that proudly showcases your brand.
(At this point, if your mind is racing with patch ideas, you’re not alone. I once brainstormed a dozen patch designs just because I discovered I could do custom shapes – suddenly everything from my dog’s silhouette to my favorite catchphrase seemed patch-worthy!)
Get Started: Transform your logo into a custom leather patch hat today. Contact The Monterey Company for a free quote, and let’s craft something extraordinary together – with style, quality, and that personal touch that sets your brand apart. Your dream hat is just a patch away!
Patch Backing Options & Application Methods
Designing a beautiful patch is only half the story – how do you actually attach that patch to a hat (or jacket, bag, etc.)? This is where patch backing options come in. The “back of the patch” can be configured in a few ways, and each method has its pros and cons. You’ll want to choose a backing that fits how you plan to use the patch. Let’s go through the standard methods to give you a step-by-step guide (in spirit, if not literally numbered steps) on patch application.
1. Iron-On Patches (Heat-Activated Adhesive): This is probably the easiest and most popular method for hats and apparel if you’re aiming for a DIY application. An iron-on patch has a special heat-activated adhesive layer on the back. It looks a bit shiny and plasticky when you examine the back of the patch. When you apply heat (using a household iron or a heat press machine), that adhesive melts and bonds the patch onto the fabric. It’s like glue that needs heat instead of air to work. The appeal of iron-on is that you don’t need a sewing machine or any sewing skills at all – just some careful ironing. To attach, you’d place the patch on your hat at the desired location, cover it with a pressing cloth (to avoid direct heat on the leather), and press down with a hot iron (around 270-300°F is typical, check instructions) for about 20-30 seconds with firm pressure. Always use a flat surface, and maybe put a towel inside the hat to press against. Let it cool for a minute, and voila! The patch should stick firmly. I think the first time I tried this, I was a bit nervous – would it really stay? – but it was pleasantly surprising to see how strong that bond is. Modern iron-on adhesives form a strong bond with the fabric when applied correctly. For best results, ensure you iron evenly over the whole patch, including edges. You might even flip the hat inside-out and iron from the back side briefly, if the material allows, to heat the glue thoroughly. Iron-on patches are a great way to apply patches quickly, and the hold is quite durable for most casual use. However, truth be told, if a hat is going to see heavy wear and tear, lots of washing, or rough treatment, iron-on alone can eventually start to peel at the edges. They’re not invincible – edges might lift after dozens of wash cycles or if the hat flexes a lot. One trick: you can always add a few stitches to an ironed patch to secure it further (some folks iron, then also sew, a belt-and-suspenders approach). But if you want maximum longevity, that brings us to the following method.
2. Sew-On Patches: Sewing a patch on is the old-school method. It takes a bit more effort, but it provides superior durability. A sew-on patch has no adhesive on the back – it’s just leather (sometimes with a thin backing cloth). You attach it by stitching it directly to the hat. This can be done by hand with a sturdy needle and thread, or with a sewing machine (if the hat can be maneuvered under the needle, which is possible for many caps if you’re careful or have a free-arm machine). When you sew a patch on, you’re creating a permanent bond that won’t budge through washes, rain, or anything – the patch essentially becomes part of the hat’s fabric. In fact, sewn patches are known to be highly resistant to wear and tear. You could say sewing is for when you need the patch to stay on forever (cue echo). Many people choose sewing for long-lasting results, especially on work hats, jackets, or items that will get heavy use. The downside? You do need some skill and patience. I’ll be honest: my first hand-sewing attempt on a leather patch was a bit wobbly. I had uneven stitches and pricked my finger twice (oops). But with a thimble and some practice, hand-sewing can be therapeutic. Pro tip: Pre-punching tiny holes around the patch with an awl can help guide your stitches through thick leather. If sewing by machine, use a sharp leather needle and go slowly. It’s worth it – a sewn patch looks classic, and you can even choose a thread color that accents the patch nicely. Suppose you’re not up for DIY sewing. In that case, The Monterey Company actually offers to do this part for you: they can deliver your hats with the patches already expertly stitched on, so you get that clean, durable finish without any hassle. They mention hand stitching adds an “artisanal touch” while ensuring a more secure attachment, and that’s spot on. Nothing beats that peace of mind when you run your finger over a sewn border and feel how solidly it’s attached.
3. Other Backings (Hook & Loop, Adhesive, etc.): Depending on your project, you might consider alternative backings. One popular option for military or tactical gear is hook & loop backing – basically Velcro patches. One side of the Velcro is attached to the patch, and the other is connected to the item; you can easily attach and detach the patch as needed. This is great if you want to swap patches (such as different name tapes or flags on a hat or uniform). For a hat, you’d have to have the loop side somehow on the hat – some tactical caps come with a Velcro area built in. It’s a more niche method for specialized uses, but it’s worth mentioning. Another possible backing is a stick-on adhesive (peel-and-stick), though those are usually temporary. I’ve seen people use a strong double-sided adhesive sheet to stick a leather patch on for a quick event, but honestly, that’s not a long-term solution (just a nifty hack for a quick photo shoot or something). There are also “badge reel” style attachments or pin-backings, but those don’t really apply to hat patches typically. For most hats, you will generally have the choice between iron-on and sew-on (or both). And remember, you can always iron-on first to position it, then sew for ultimate hold – that patch is not going anywhere after that, I think even a tornado wouldn’t rip it off!
If you’re unsure which method to use, consider the item and its intended use: Is it a DIY project on a hat you already own? Iron-on might be easiest. Is it for merchandise you’ll give to customers or a sports team, where you want the highest quality finish? Professionally sewn-on is likely best. The Monterey Company can advise on this during your order. They might even suggest, for example, heat-pressing the patches onto hats using professional equipment (which is like a big iron that ensures even, correct temperature) – that often gives a stronger, more uniform bond than a household iron. Hence, it’s a nice middle ground. In one of their videos, they compare using a regular iron versus a hat heat press for applying leather patches, showing that both work, but a heat press can be more efficient for batches. Either way, they’ve got you covered.
(True story: The first time I ironed a patch onto a hat, I was so eager to see if it stuck that I touched it a second after ironing – do not do that! It was hot (duh!). Now I use a spatula or patiently wait for it to cool. Lesson learned, and the slight finger singe was worth the cool patch I got in the end.)

Custom Leather Patch Hats – A Style Statement for Your Brand
We’ve discussed making the patches extensively, but what about the hats themselves? Leather patches can be put on virtually any fabric surface, but one of the most popular uses today is on hats. Custom leather patch hats have become a bit of a trend — you’ve probably seen them: a nice trucker hat or dad hat adorned with a rugged leather patch on the front, maybe with a brewery logo, a national park emblem, or a cool stylized company logo. It’s a look that balances casual and classy. (I like to think it says “I’m chill, but I’ve got style,” which is basically what I aspire to in life.)
From baseball caps to beanies, adding a leather patch instantly upgrades a hat’s vibe. The Monterey Company offers over 500 different hat styles you can choose from, and they’ll help pair them with your custom patch. Whether you’re into flat-bill snapbacks, classic mesh-back trucker caps, low-profile unstructured caps (the “dad hat” look), or even flex-fit technical caps, there’s something for everyone. Each hat style gives a slightly different canvas for your patch, but leather patches are truly versatile – they look as great on a camo trucker hat as on a solid charcoal gray dad hat. I’ve had customers order leather patch beanies for winter swag, and those came out awesome too (the patches were sewn on a cuffed knit beanie, super cozy branding).
Why are brands and individuals falling in love with leather patch hats? Well, besides just looking cool, they convey a sense of quality. A leather patch exudes a sense of luxury and durability, which reflects positively on your brand’s image. Think about it: leather has been used for ages for its strength and classic appeal, so when people see your logo on a leather patch, it subconsciously signals sturdiness and trustworthiness. It’s a bit like the difference between a paper business card and an embossed leather business card holder – one feels more premium. Companies find that folks want to wear these hats, so their logo gets extra visibility. The hat becomes a walking billboard – or, as The Monterey Company puts it, “a walking advertisement, a constant reminder of your brand to anyone who sees it.” That’s marketing gold right there. I personally have a growing collection of branded hats from various breweries and outdoor brands, and the leather patch ones are the ones I wear the most. They have that X-factor.
Let’s not forget, leather patches aren’t the only patch type out there – and depending on your brand’s style, you might consider other options too. Embroidered Patches give a more retro or craft feel with thick threads and merrowed edges. PVC patches (made of rubbery material) are fantastic for very modern or 3D looks, and they’re totally weather-proof. Woven patches can capture tiny details with thread. Chenille patches (those fuzzy, letterman jacket-style patches) offer a fun, textured look for a vintage vibe. The Monterey Company actually produces all these styles and more, so you have no shortage of choices. However, leather has a certain universal appeal – it pairs exceptionally well with outdoor brands, breweries, coffee roasters, and any company seeking an artisanal yet professional image. Even sports teams and clubs are using leather patches on hats for a unique merch item. It’s pretty neat when a single patch design can elevate the whole hat’s perceived value.
And guess what – creating custom leather patch hats with The Monterey Company is easier than you might think. They have a smooth process: you reach out (send your logo or idea), their team helps with the design mockup and patch style selection. You get to see a proof of what the hat and patch will look like, and once you approve, they produce it. Throughout, you get a dedicated rep (real humans with real advice – their customer service is something they’re proud of). It’s a very hands-on, friendly experience. They’ve been doing this since 1989, so they’ve got a lot of expertise under their belt. (I imagine if patches could talk, there’d be some great stories from the thousands of custom patches they’ve made!).
So, envision your logo on a nice leather patch, on a classy hat. How does it feel? Pretty exciting, I’d say. It might even give you a bit of pride and confidence when you wear it or give it out to clients. That’s the power of merging good design with quality materials.
Before we wrap up, I want to mention care: a leather patch hat doesn’t need special treatment, but generally hand-washing the hat or gentle cleaning will help the patch last even longer. Leather can be conditioned lightly if it starts to dry, but usually that’s not an issue unless it gets soaked and dried repeatedly. My own leather patch cap hasn’t needed any TLC beyond brushing off some trail dust after hikes.
Alright, I think we’ve covered the journey from raw leather choice to finished hat. Let’s bring it all together and set you off on creating your own custom patches!
Final Thoughts
Crafting a custom leather patch hat is a great way to showcase your style and brand with a personal touch. We’ve explored how choosing between genuine and faux leather can influence the character of your patch, how you can tailor the shape and design for that just-right look, and how to securely attach the patch so it stays put through all of life’s adventures. It’s not about making a perfectly polished, hyper-symmetrical product – in fact, the little nuances (a natural leather grain here, a hand-stitched line there) give each patch its personality. And that’s something a machine-made, mass-produced cap can’t replicate.
Perhaps the most rewarding part is seeing the final product: your logo or artwork on a handsome leather patch, turning an ordinary hat into something truly special. It’s like brand identity meeting fashion. And when your customers, team, or friends put on that hat, they’ll not only remember your brand – they’ll feel connected to it. One client told me wearing his company’s leather patch hat made him feel like he was part of an “exclusive club” of fans. That sense of pride and unity is priceless (I smiled and maybe felt a tiny bit of that pride myself for having helped make it).
If you’re feeling inspired to start your own patch project, I encourage you to leap. Don’t worry if you’re new to this – we’re here to help at every step. The Monterey Company team lives and breathes custom merchandise, and we genuinely get excited about bringing new designs to life. We’ll make sure your patches come out looking top-notch, using quality materials and careful craftsmanship so you’re thrilled with the result.
Ready to create your custom leather patches? Go ahead and get a free quote or drop us a line (or even give us a call at 877-290-9290 – we’d love to chat about your ideas). Whether you have a full design ready or just a spark of an idea, we’ll guide you through the process and make it easy and fun. In the end, you’ll have awesome leather patch hats that you’ll be proud to wear, share, and maybe even show off a little. 😉
Thank you for taking the time to read through this guide. I hope you found it informative and engaging (and maybe chuckled once or twice at my patch-related musings). Now, make some amazing patches and hats! We can’t wait to see what you create.
Happy patch-making! Perhaps we’ll be stitching or pressing a patch for you soon!

Eric Turney
Eric Turney A devoted father, football fanatic, and stand-up comedy enthusiast who loves nothing more than bringing people together over great food and a good time. When he’s not cheering on his favorite team or experimenting in the kitchen, you can find him connecting with others on LinkedIn